Tag Archives: Tips

setup VSCode with REACT_EDITOR (or any editor)

When an error occurs with an app Created with Create React App the error screen is super helpful.

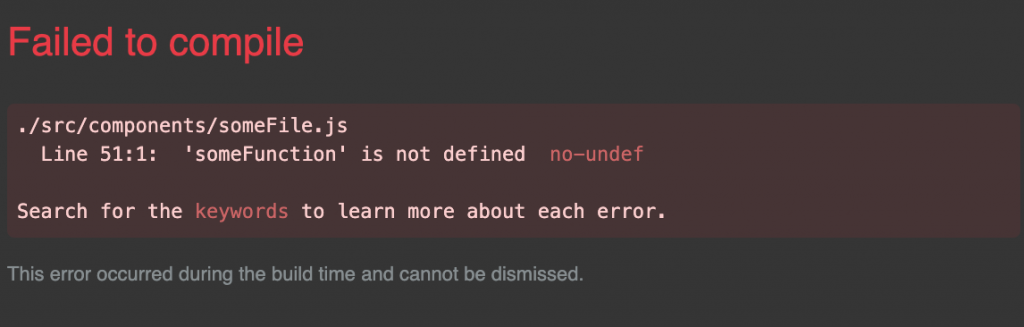
You can click on this error in the browser to jump directly to the line of code inside your editor! But how do you setup VSCode with REACT_EDITOR?

Console error:

Could not open SomeFile.js in the editor.
To set up the editor integration, add something like REACT_EDITOR=atom to the .env.local file in your project folder and restart the development server. Learn more: https://goo.gl/MMTaZt

Setup your editor to be open from terminal

Google “How to open [your editor] from terminal” to find instructions for your editor.

For VSCode, open the command pallet ( Command Key + P ) and type > shell to install “code” into your PATH environment variables.

You should now be able to open terminal and type code to open VSCode. Pretty nifty!

Setup your React Project to know which editor to open

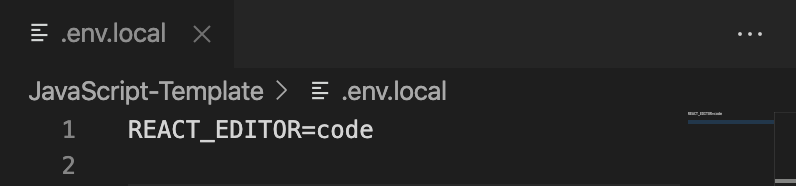
Create a new file (or edit the existing) .env.local file.

setup VSCode with REACT_EDITOR this will be REACT_EDITOR=code and for other editors set it to the command you found to open your editor from the terminal.

Credit to this StackOverflow Answer.

Related post: Favorite Sublime 3 Packages

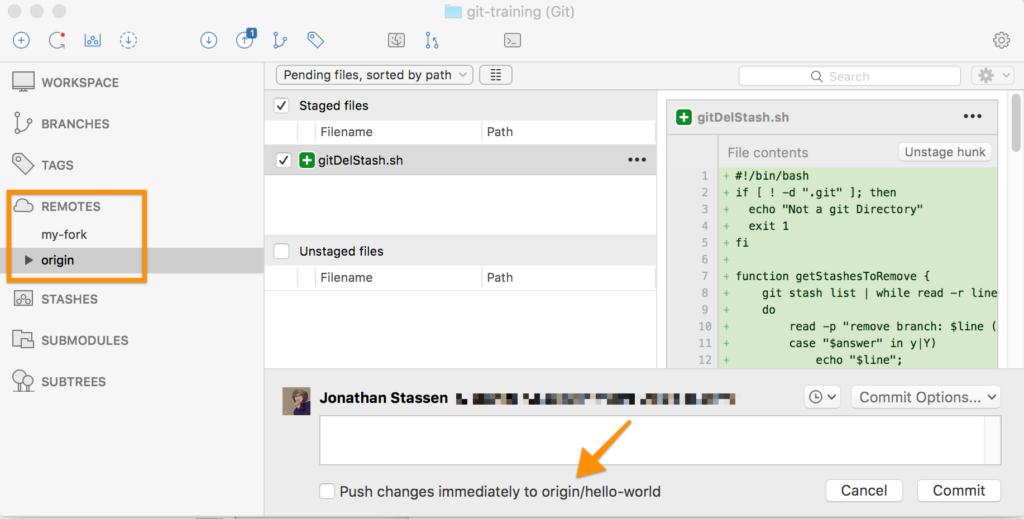
(cover photo credit: Jonathan Stassen / JStassen Photography)

50+ Ways to Travel Cheap Around the World

Thinking back on how I travel I realize that I’ve develop a set of principles for ways to travel cheap and keep costs low.

These are only general rules of thumb and all are subject to being broken.

50+ Ways to Travel Cheap
1 Week in California $45/day (Excluding flight)

Recent trip costs

Two weeks in Europe France -> Switzerland -> Germany $2500
(~$105 / day without flight)

One week in Alaska $800
(~ $40 / day without flight)

One week in Europe Poland -> Slovakia $1,800
(~$150 / day without flight)

One week in NYC $1,700
(~$97 / day without flight)

Three weeks in Japan $3,000
(~$60 / day without flight)

Ways to Travel Cheap

Pick an affordable destination

  1. Look up food cost
  2. Look up lodging cost
  3. Look up transit cost

Airfare

  1. Be flexible with departure dates, use an app that shows nearby date prices.
  2. Google Flights
  3. Hopper App
  4. Hipmunk App
  5. Chepoair
  6. Book Directly with airline
  7. Max out your carry on (Check as few bags as possible)
  8. Don’t buy things on the airplane or at airport
  9. Don’t upgrade your seat, your only on the plane for a few hours
  10. Some airlines charge to pick your seat, don’t pick a seat.
  11. If a company is paying for flights, extend the days.

Attractions

  1. Book online, sometimes there is a deal / coupons
  2. Pay as a group
  3. Share audio tours – makes it more social
  4. Consider a multi-attraction pass
  5. Stop by a hostel (even if you’re not staying), sometimes there are deals on attractions & tours
  6. Don’t buy the all access pass if you don’t have time to see everything
  7. If you are a student, pay student pricing
  8. Check if you get discounts with AAA, Your Credit Card company, AARP, etc.

Food

  1. Minimize eating out
  2. Street food / Food carts are generally affordable and good
  3. Bakeries
  4. Grocery stores
  5. Cook
  6. Snacks
  7. Refill a water bottle instead of buying beverages.
  8. Eat 2 blocks away from tourist destination.
  9. Pack and bring lunch to tourist destination,
  10. Pick cheep food destination.
  11. Share entrees
  12. Keep and eat any leftovers instead of tossing
  13. Check local customs on tipping. You might not need to tip, even though it may feel odd.

Lodging

  1. Couchsurfing
  2. Stay with friends, or friends of friends. (ask facebook)
  3. Hostel (book directly if possible or by phone, avoid sites that add a fee)
  4. AirBnB
  5. Camping
  6. Call other hotels and talk them down by comparing prices
  7. Use your AAA membership discount if you have it

Transit

  1. Rail deals (tourist pass)
  2. Split cost between travelers (car, group train ticket)
  3. Compare bus vs Train
  4. Spend time reading and understanding a city’s light rail & bus passes to find the best fit for your visit.
  5. Don’t drive the toll ways
  6. Park a little ways away
  7. Consider alternatives
  8. Walk / Bike

Currency

  1. Don’t get the currency before you leave (ok maybe a little)
  2. Don’t get currency at a cash exchange (terrible exchange rate)
  3. Withdraw cash at ATMs with a debit card
  4. Use a Credit Card with no foreign transaction fee.
  5. When given the option always charge the transaction in the local currency, it will convert with fewer fees.
  6. Prefer credit card to cash if possible

Phone

  1. Check what is free with your current provider. For instance texting both photos & videos is free internationally with AT&T, but calling and cell data costs.
  2. Disable all cellular data on your phone to avoid fees. Only enable on a per-app basis as needed.
  3. Download offline maps & language translations to reduce data use.
  4. Don’t check your voicemail.
  5. Bring an unlocked cell phone, and buy a local SIM, takes research.
  6. Call home using WiFi with VoIP. Like Google Hangouts, Skype, Whats App, FB Messenger, etc.

Other thoughts

  1. Don’t buy souvenirs, find souvenir (rocks, snacks, etc)
  2. Research Global Blue
  3. Check behind you and don’t loosing things – replacing items costs
  4. Check if you need to buy travel insurance

Did I miss something? Do I have something wrong? What ways to travel cheap do you know? Leave a comment, I’m always updating this list with more ideas / corrections!

7 Ways to Get More Likes on Instagram

Starting out on Instagram is tough. I’m still building my following. I’ve figured out a couple of patterns that are best to follow when posting to get more engagement on posts. Here are 7 ways to get more likes on Instagram that I’ve found.

Post in the early morning, or the evening.

People tend are busy during the day, they check their feeds either when they are getting ready for the day or after they are starting to wind down. Of the two, evening tends lead to a slightly better output.

Here I posted around 5pm.

Post at the best time for you audience.

Know your audience. If you’re posting a shot from a past trip to another country, try to match your post with when they are awake. Thinking about your audiences you might be able to get two audiences at the same time.

For instance, this shot is taken in Switzerland, I live in Chicago. I posted at 7am (morning) Chicago time 3pm (evening) Switzerland time. I hit both my local audience and my Europe audience.

Hashtag your post

I’ve seen many great photographers fail to put any hashtags on their posts. Hashtagging is a central feature of Instagram. It’s a key way for others find your post.

I follow the four Ws + D rule:
Where? (stmaryglacier, colorado) What? (mountains) How? (lensbaby, tiltshift) Doing? (hiking).

Use only hashtags that have posts

Being creative is good, but if you make up a new hashtag or hashtags that has few posts – No one will find your photo with that hashtag.

On this shot every hashtag here has at least 1,000 posts.

Hashtag in different languages

Hashtagging in other languages broadens the size of your audience. You don’t need to use obscure hashtags. I recommend using Wikipedia instead of Google Translate.

In this shot I looked up the article ‘Dragonfly’. On the left of Wikipedia you’ll see a list of the article in different languages.

Add a geo location

Every photo was shot somewhere. You can only set one location, but there might be duplicates of the location on Instagram. Before posting try to searching the location to see which one gets tagged with similar photos.

For instance here you can see I set the location for this post to Steamboat Resort.

Skiing in a wonderland. . . . #steamboat #winter #winterwonderland #snow #ski #skiing #colorado

A post shared by Sir.Nathan Stassen (@thebox193) on

Like back

When someone likes your photo, take a moment to scroll through their feed and like a photo or two, maybe leave a comment. But wait a few minutes before doing this. What you want is to pull them back to view your feed. They sometimes recognize your username / avatar and will view your feed to like more shots. You’ve invested in them, they will now invest time back in you.

Everyone that liked this shot, I liked at lest one of their photos back.

Changing SourceTree’s Default Remote

I’m going to talk about changing SourceTree’s default remote.

When you’re pushing a new branch, SourceTree will automatically guess which remote you wish to push to by default.

SourceTree defaults to origin

By default SourceTree will always pick origin to push a new branch to. Depending on your workflow, you may want to set another remote as your default, let’s say my-fork for instance.

SourceTree defaults pushing new branches to origin

Renaming a remote

Interestingly all we have to do is rename our remotes. Since SourceTree always picks origin we just need to rename to anything else. Perhaps to the name of owner of the repo like SproutSocial or FaceBook. It’s safe to rename the remotes, it’s just a nickname only used locally.

(I’ve never been a fan of “origin“, it’s terribly confusing and ambiguous for those learning git).

Steps to rename the remote

via git

git remote rename origin SproutSocial

In SourceTree

  • Open the repo settings (gear in top right)
  • Remotes tab
  • Click on the remote
  • Edit
  • Change the Remote Name

SourceTree Remotes Setting
Editing remote names

Changing SourceTree’s Default Remote

Once we’ve renamed origin, SourceTree will always pick the remote that comes first alphabetically. So, do the ‘ol classic prefixed by numbers. Here I’ll name them 01-my-fork and 02-origin.

Boom! SourceTree picks 01-my-fork by default!

Changing SourceTree's Default Remote
Setting your preferred remote as default

Simple workflow optimizations like this, make me happy.

Tips: My Favorite Sublime 3 Packages

I primarily use Sublime as my code editor of choice; a bunch of us at Sprout Social do. It’s simple, clean, lightweight on system resources, and it has some pretty sweet packages. I’ve found a number of packages that increase my efficiency developing. Thought I’d share several of these personal favorite Sublime 3 packages.

If you’re on Sublime 2, upgrade to Sublime 3, it’s totally stable.

To get started you’ll need to install Sublime Package Control into Sublime. It’s fairly simple, and the you’re read to go. The “Package Control: Install Package” command will now be available in your command pallet via Cmd+Shift+P or Ctrl+Shift+P.

SublimeLinter

SublimeLinter
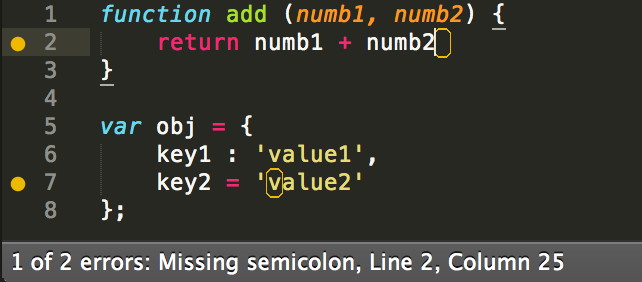
Base package for all linters. Syntax error highlighting can greatly reduce the save-run-revise cycle time. Most IDEs already have syntax error highlighting, why not add it to Sublime?

There are many SublimeLinter packages. Browse through them find what fits your workflow. Be sure to follow each packages setup instructions, each will be a bit different.

My personal must have’s are:

  1. SublimeLinter-phplint
  2. SublimeLinter-jshint
  3. SublimeLinter-jsxhint
  4. SublimeLinter-csslint
  5. SublimeLinter-contrib-scss-lint

BracketHighlighter

BracketHighlighterAn even better bracket highlighting than what comes with Sublime. It also shows starting and ending brackets in the gutter, and can matching for [ ], ( ), { }, ” “, ‘ ‘, <tag> </tag>.

SideBarEnhancments

Give the context menu more options when right clicking on files in a project. Duplicate files, move, rename, etc.

DocBlockr

DocBlockr
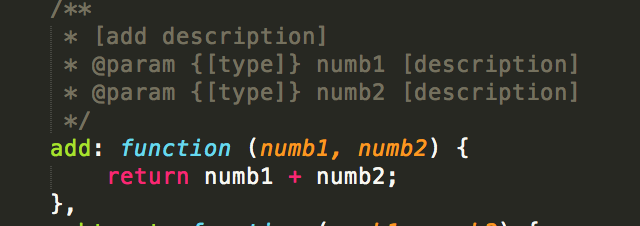
Easier creation of document blocks for functions, classes, methods. It’s intelligent and looks ahead to see what you’re documenting to pre-fill the base info (such as input parameters and what is returned). Documenting is now convenient.

Pro tip: use the Tab key to navigate through the generated documented block, no need to click or use arrow keys.

Shell-Turtlestein

Launch the terminal/command line right in the context of your project directly from Sublime.  Either as a new window or as its own panel within sublime.

GitGutter

Visually shows the diff since the last commit in the gutter.  At a glance you can see what lines are additions, modifications, or deletions.

Origami

Split Sublime into multiple horizontal and vertical panes for side-by-side work. Remove the need to switch between tabs or windows as frequently when comparing files.

TrailingSpaces

Highlights and helps cleanup end of line trailing spaces. Nobody likes them right? Or maybe we just don’t notice them.


There are many other great packages out there for Sublime : code snippets, theme,  and syntax highlighting. But these are just some of my favorites.

How to Speed up Siri

Wish Siri was faster?

Here is a nice setting tweak to speed up Siri and make her more responsive. I found disabling the Voice Feedback (so Siri doesn’t talk out loud), makes her snappier.

Downside: You will have to read the screen.

Settings > General > Siri > Voice Feedback
Change to: Handsfree Only

1. General
General
2. Siri
Siri
3. Voice Feedback
Voice Feedback
4. Change to Handsfree Only
Voice Feedback Handsfree Only to Speed up Siri

From my understanding, this probably bypass the need for Apple’s servers creating the verbal dictation audio, and having to transfer it over Cellular Data / Wifi to your device. Aka, time.

Reliability boost? Maybe.

As a bonus Siri overall seems more reliable as , I get a lot fewer “I’m unable to process your request right now” responses it seems. But you will have to find out for yourself there. But with out a doubt Siri is a bit faster.

Tip: Hibernate – Sleep – Shutdown

Just to clear things up, I though I would quickly go through the differences of Hibernate, Sleep, and a full shutdown of any computer.

RAM makes the all difference!

The main difference has to do with how RAM is being used. So let me give a quick understanding of what RAM is and how it is used.

RAM is temporary ‘running’ memory. When a computer is booting up, it really is loading all the necessary files to work over into RAM. Now RAM also used to remember what programs you have open, what web page you are one, what you have typed but haven’t saved yet, and so on. Simply put, it tires the state of thing.

Now we can dive into the differences.

Shutdown

Scraps all data in RAM, forgetting the state of things on screen, then powers off all components (RAM chip, CPU, keyboard, screen, wifi card, etc).

Sleep

Continues to supply a little power to RAM chip keeping the state of thing. But powers off all other components (CPU, keyboard, screen, wifi card, etc). This means it can pick up where it left off very quickly, just need to power on all other components. Mac Laptops are well known for this, windows can do it as well.

Hibernate

Saves a copy of everything in RAM to the hard drive. This allows it to scrap everything in RAM and powers off all components (RAM chip, CPU, keyboard, screen, wifi card, etc) this consuming no power. When powered back on, it can restore the state to RAM as it was from the Hard drive, picking up where it left off. It can take a bit longer to save and restore the RAM, the benefit is mainly no battery drain.

What is best?

Which is best to use? Well that’s up to you. For me it largely depends on how long I will be away. Sleep short, hibernate long, shutdown long or weekly.

A rhyming rule of thumb:
Out for a treat – then sleep
Out for a date – then hibernate
Out for weekend cool down – then shutdown

Nevertheless, now you know!