Tag Archives: Photography

Shooting Raw instead of JPG

A while back I switch from shooting Raw instead of JPG. It was a bit of a leap of faith. I didn’t know how I was going to be able to use my photos when they weren’t JPGs.

Why?

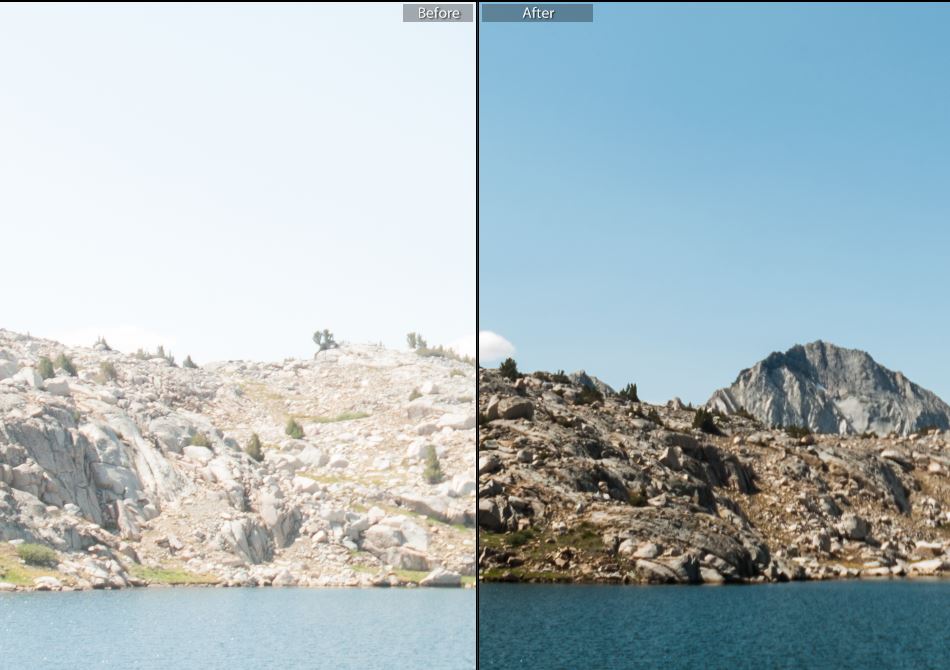
Check out this photo. If I was shooting JPG what you see on the left is all I would have. No way of saving anything. That photo is a gonner, throw it out.

But since I was shooting RAW, all the data is there. It just needs to be brought out. Heck, look at the sky right at the bottom on the line of the before/after. There’s a cloud!

Left image is over exposed with blown out sky, right image has recovered sky and can even see a cloud.

It’s photos like this that have sold me on shooting RAW.

JPG Pros / Cons

Pros:

  • Ready to be posted or shared
  • No need to do further processing in another application

Cons

  • Already processed in camera
  • Considered Final
  • (8bit)

Raw Pros / Cons

Pros:

  • More data
  • More color data (12 or 14bit)
  • Higher detail in shadows / highlights
  • You determine how the data interpreted
  • Can recover from over / under exposed images
  • Color temperature easily corrected
  • Non-destructive editing
  • Better sharpening / noise reduction

Cons:

  • Larger file size
  • Need software on the computer like Lightroom
  • Cannot use images on social sites
  • Takes longer to write a photo the your camera chip
  • Photographers with Time
  • “Flat” / Low contrast – Not developed yet

7 Ways to Get More Likes on Instagram

Starting out on Instagram is tough. I’m still building my following. I’ve figured out a couple of patterns that are best to follow when posting to get more engagement on posts. Here are 7 ways to get more likes on Instagram that I’ve found.

Post in the early morning, or the evening.

People tend are busy during the day, they check their feeds either when they are getting ready for the day or after they are starting to wind down. Of the two, evening tends lead to a slightly better output.

Here I posted around 5pm.

Post at the best time for you audience.

Know your audience. If you’re posting a shot from a past trip to another country, try to match your post with when they are awake. Thinking about your audiences you might be able to get two audiences at the same time.

For instance, this shot is taken in Switzerland, I live in Chicago. I posted at 7am (morning) Chicago time 3pm (evening) Switzerland time. I hit both my local audience and my Europe audience.

Hashtag your post

I’ve seen many great photographers fail to put any hashtags on their posts. Hashtagging is a central feature of Instagram. It’s a key way for others find your post.

I follow the four Ws + D rule:
Where? (stmaryglacier, colorado) What? (mountains) How? (lensbaby, tiltshift) Doing? (hiking).

Use only hashtags that have posts

Being creative is good, but if you make up a new hashtag or hashtags that has few posts – No one will find your photo with that hashtag.

On this shot every hashtag here has at least 1,000 posts.

Hashtag in different languages

Hashtagging in other languages broadens the size of your audience. You don’t need to use obscure hashtags. I recommend using Wikipedia instead of Google Translate.

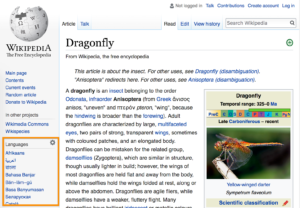
In this shot I looked up the article ‘Dragonfly’. On the left of Wikipedia you’ll see a list of the article in different languages.

Add a geo location

Every photo was shot somewhere. You can only set one location, but there might be duplicates of the location on Instagram. Before posting try to searching the location to see which one gets tagged with similar photos.

For instance here you can see I set the location for this post to Steamboat Resort.

Skiing in a wonderland. . . . #steamboat #winter #winterwonderland #snow #ski #skiing #colorado

A post shared by Sir.Nathan Stassen (@thebox193) on

Like back

When someone likes your photo, take a moment to scroll through their feed and like a photo or two, maybe leave a comment. But wait a few minutes before doing this. What you want is to pull them back to view your feed. They sometimes recognize your username / avatar and will view your feed to like more shots. You’ve invested in them, they will now invest time back in you.

Everyone that liked this shot, I liked at lest one of their photos back.
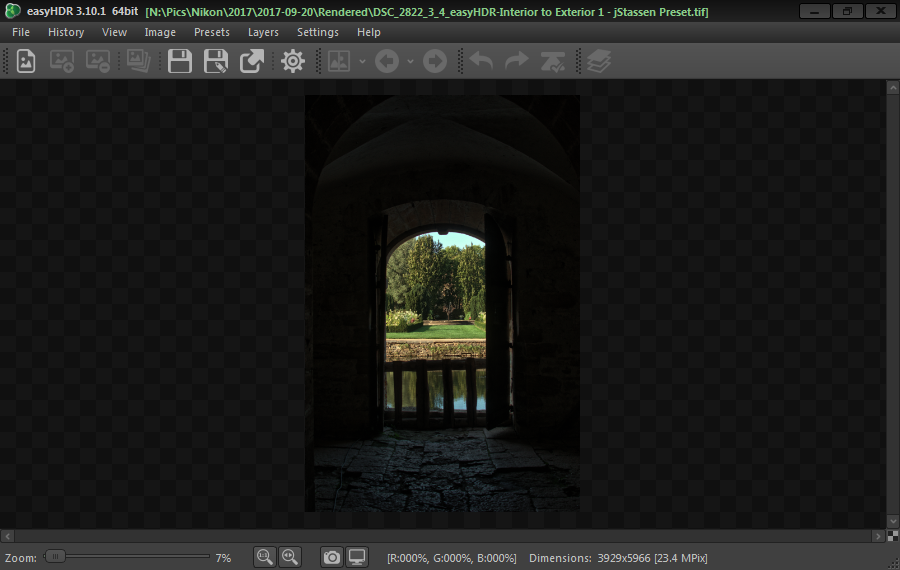
easyHDR Preset Download

This is my first easyHDR preset available to download. Feel free to share and link back. Preset bundles will be coming soon.

Zip File

Interior to Exterior 1 – jStassen Preset.zip

The Preset

The preset focuses on realism on the exterior, while illuminating the interior just enough to give context for the scene.

Sample

Free easyHDR preset download jstassen
easyHDR preset Interior to Exterior 1 – jStassen

Install the easyHDR Preset

  1. Open easyHDR
  2. From the menu click Presets-> Reveal User Preset Files
  3. Places all presets into this folder
  4. Close & re-open easyHDR


Photo Exif Edit

I discovered that is is rather difficult to edit exif tags on photos. Its probably by design to prevent tampering of falsifying information.

I have been creating HDR photos with my Nikon D5000. It’s been a great success and good fun! However my HDR software keeps all the original exif info from the first image in the series. Some of the data is no longer relevant  specifically the the exposure length or ISO! Can you imagine an HDR photo take at 1/1000 sec with a 200ISO? I think not!

Why does it matter? Well my over in my Photo Gallery it shows the camera settings at which each of the photos were shot. It bugs me that on those types of work it shows wrong info!

I spent some time searching and eventually came upon ExifToolGUI.

  • Allows you to edit / remove many exif tags
  • Edit geolocation
  • No cost

It takes a little effort to set it up, but here is a great tutorial of setting it up. But basically you have to place the command line ExifTool in the same directory as the ExifToolGUI app.